Simple Polar Alignment by Astro-Baby
This is quick guide to simple polar alignment with an equatorial mount. Its designed only to get rough polar alignment suitable for observing.


Newcomers to astronomy are quite often easily put off from equatorial mounts by being told they are complex to set up and use. My own personal experience is that they are no more difficult to manage than a standard alt-azimuth and have the advantage that when polar aligned they make life easier when your observing as you have only one control to handle to keep the telescope pointed at an object.
Beginners are often frightened by the idea of 'Polar Alignment' as it can seem quite complex. Its actually fairly easy. This guide will talk you through a rough Polar Alignment that will be easily good enough for observing with. If you want a more accurate alignment for astro-photography then you could start with my guide for aligning the HEQ5 which will give a more precise alignment. for full on accuracy you will need to carry out a star drift test. That isn't covered in either of my guides as I dont need that level of accuracy for observation.

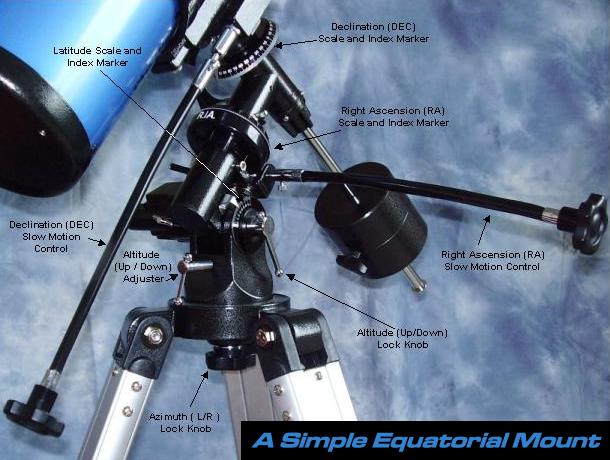
Before you start the guide it may be useful for you to familiarise yourself with an equatorial mount. You can see a fairly simple equatorial mount with its main components listed HERE.
Why Polar Align ? - As the earth rotates the stars appear to cartwheel through the sky above. By aligning the telescope to a fixed point in the sky which isn't moving allows you to track objects using only the Right Ascension control. The Right Ascension movement compensates for the earths movement and allows the telescope to 'track' an object. The part of the sky which doesn't move is of course the North Celestial Pole ( if your in the Northern hemisphere ) which is rather like a hub around which the stars appear to rotate.
Polar alignment is simply the process by which we aim the telescope at the NCP. In fact in this guide we wont be aiming at the NCP we'll aim at the Pole Star - Polaris. Luckily in the Northern Hemisphere Polaris is very close to the NCP and provides a good enough 'fix' for observing.
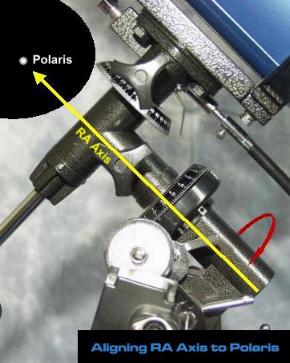
Aligning the Right Ascension Axis to Polaris The basic aim of Polar Alignment is to align the telescope mounts Right Ascension (RA) axis to Polaris.

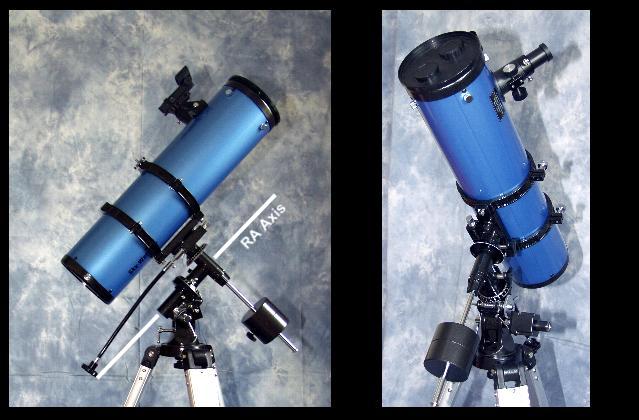
The picture to the left shows the RA Axis of a standard equatorial mount and the motion the axis operates in. This is in the same plane as the one in which the stars appear to move.

The simplest method of polar alignment is simply to aim the RA axis at Polaris. That seems simple enough but many beginners don't actually know how to find Polaris.

If that's you - don't worry. I'll show you how to set your mount and telescope up to get aligned to Polaris.
 
Finding Polaris - Method 1
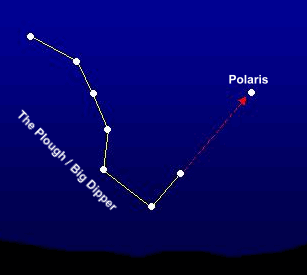
The Big Dipper & Polaris
The simplest method of locating Polaris is to locate The Plough / The Big Dipper.
Polaris lies in a direct line from one of its stars as shown in the diagram to the left.
Be aware Polaris is not as bright as most people think. There's a sort of myth its a very bright star - it isn't but it is normally visible quite soon after sunset.

The Plough / Big Dipper orbits around Polaris so it may not present exactly as seen on this diagram.
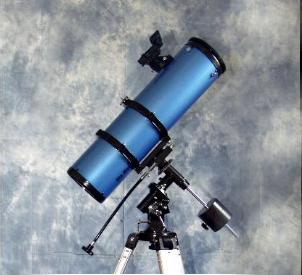
telescope - reflector Now adjust your telescope so that its in line with the RA axis of the mount - the picture to the left shows how it should look. There are more pictures in 'Finding Polaris - Method 2' below together with more detailed explanations if your stuck.

Now simply aim your RA axis at Polaris. Some Equatorial mounts will have a small target hole through the mount, some will have a target line drawn on the mount. If yours doesn't don't worry just aim as best as you can.
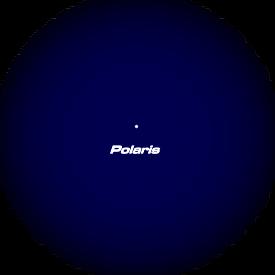
Polaris as seen through the telescope Once you have a rough fix by aiming the RA axis at Polaris you can fine tune by using the telescope mounts altitude and azimuth adjusters to centre Polaris in the eyepiece as shown to the left.

Now lock your altitude and azimuth adjustment down and your done.

This is a rough alignment but one that's good enough to observe with.

Still unsure about this ? Carry on reading for an alternate method.............
Finding Polaris - Method 2
While the method above is the simplest and one that most people who have been doing astronomy for more than a few weeks can achieve easily its none the less quite tough on the complete novice. My experience has been that few people when they start in the hobby can identify much in the night sky with any great certainty. I know I couldn't !

Heres a method that you can use to get you started until you can easily spot Polaris from a little experience.

You will need a compass to do this or at least have access to an on-line map that will give you a clue where North is. Google Earth is good, you may just know your own area well enough to know where North is. If not a cheap compass is all you need. If your using a compass make sure there's nothing metal about for 20' either side of you and that includes your telescope.

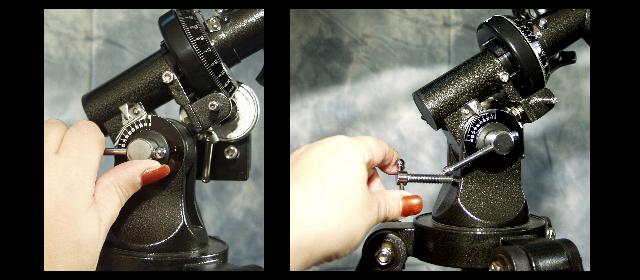
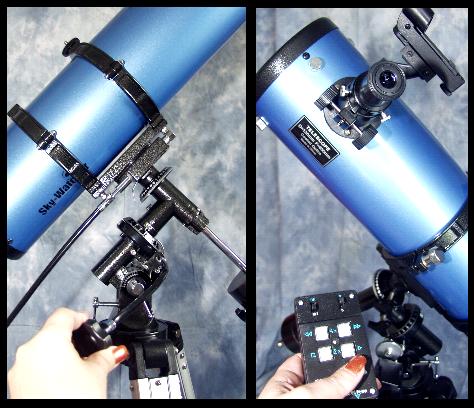
Find North and then loosen off the azimuth nut on your telescope mount and rotate the mount until the RA axis faces North. This is shown in the pictures below. Now lock your azimuth adjuster. The azimuth adjustment is the one that allows your telescope to turn right or left.
adjusting the azimuth on an equatorial mount
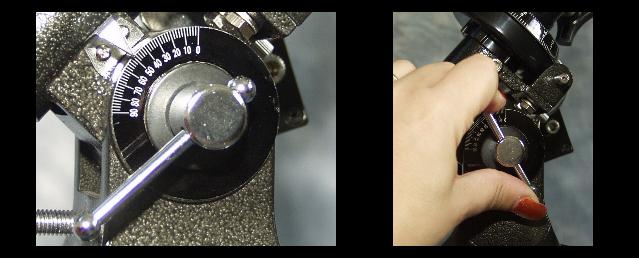
Now you need to set your latitude. For this you will need something like Google Earth or a map. If your in the UK you can just set the latitude for 51 degrees. To set this you will need to unlock your latitude lock as shown below left and then adjust the mounts latitude using the altitude nut as shown on the right.
adjusting the altitude/latitude on an equatorial mount
Adjust the altitude nut until your latitude is indicated on the latitude scale. For my location in the UK I have set up for 51 degrees as shown in the picture below on the left. Finally lock the latitude as shown below right.
The latitude scale on an EQ2
Your mounts RA axis is now roughly pointing to Polaris, Now we have to make sure the telescope is in line with the mounts RA axis.

Note: Its worth mentioning that on many low cost mounts the Altitude/Latitude scale can be less than accurate. Some users report the scales being off by as much as 10' on the scale. So if you dont find POlaris at 51' exactly then try moving the scopes altitide/latitude. Even more upmarket mounts can show a difrference between the scale and the actual position of Polaris.

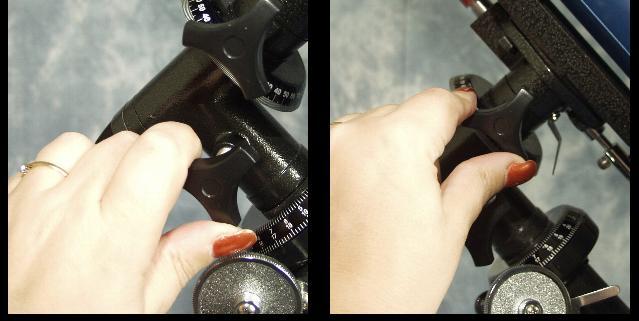
First loosen the RA and DEC lock knobs as shown below making sure you have a hold of your telescope. I am assuming if your reading this you most likely have a small, lightweight scope and have already balanced it on the mount. If your haven't then you should check how to balance your telescope.
adjusting the RA and DEC lock knobs
With the RA and DEC lock knobs loosened rotate your telescope until it sits 'over' the mount as shown below. Your Declination scale may have been preset at the factory in which case it should read 90 degrees, if not ignore the DEC scale and just set the telescope so that its in line with its RA axis. You can see on the picture to the left below that the telescope tube is in the same line/direction as its RA axis. Now lock both the RA and DEC lock knobs down.
telescope aligned to RA axis
Pole star Your telescope mount and telescope are now aligned and looking in the right area of sky for Polaris. Using a low power eyepiece you now need to 'hunt' a little using your altitude and azimuth adjusters to get Polaris centred into your eyepiece as per the diagram on the left.

Your now aligned !! Lock down your altitude and azimuth.

If you want to check that REALLY IS Polaris your seeing, release the RA lock knob and rotate the telescope around its RA axis.
Polaris should stay centred while stars around it appear to move around the eyepiece.
telescope tracking with RA movement That's it !!!

Your done and your telescope and mount are now aligned well enough for most observation needs.

You can now simply locate an object using the DEC and RA movements and track it using either just the RA slow motion control or allow your motor ( if fitted ) to track with just the odd correction.
If your using your telescope in the backyard simply make a note of where the telescope was pointing when aligned to Polaris. In my house I know the rear wall faces North almost exactly. Using that and leaving the latitude adjustment alone I can be set up in minutes. Its not a perfect alignment but it will be perfectly adequate for most observing needs with an equatorial mount.
 
That's it ! I hope you have enjoyed the guide an I hope its of some use to beginners out there. May all your stars be visible all the time.
 
Return to Astro-Baby Home Page